 Tweet
Tweet
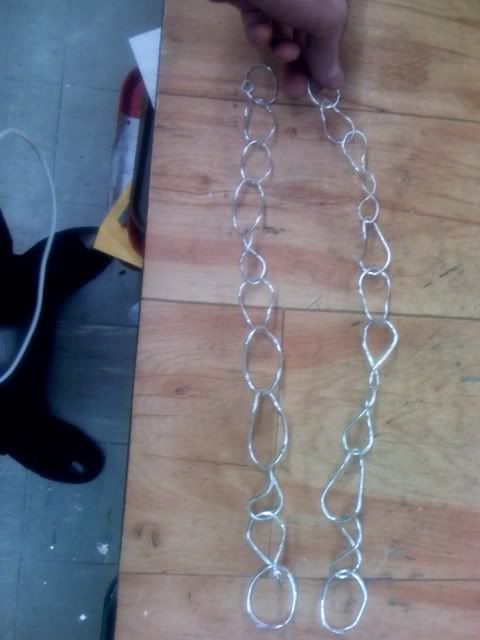
Well it took me all day at my girlfriend's university's craft center but I finished it!
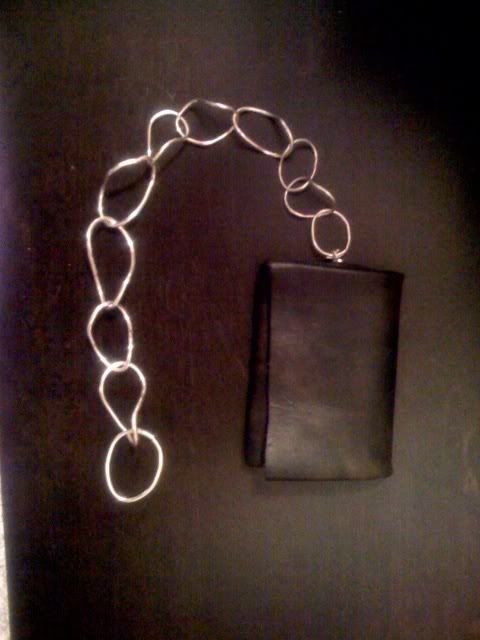
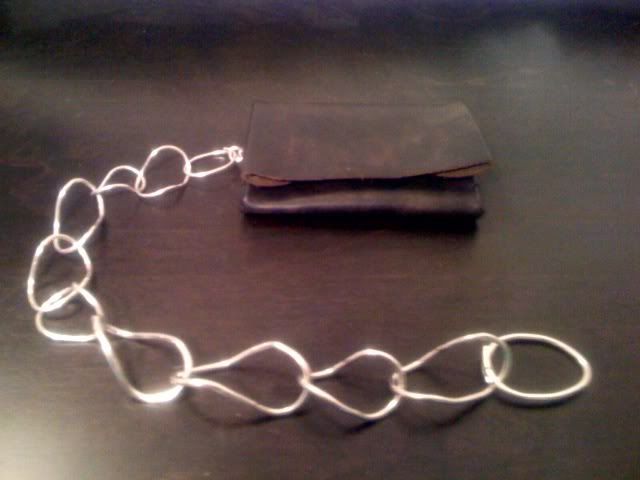
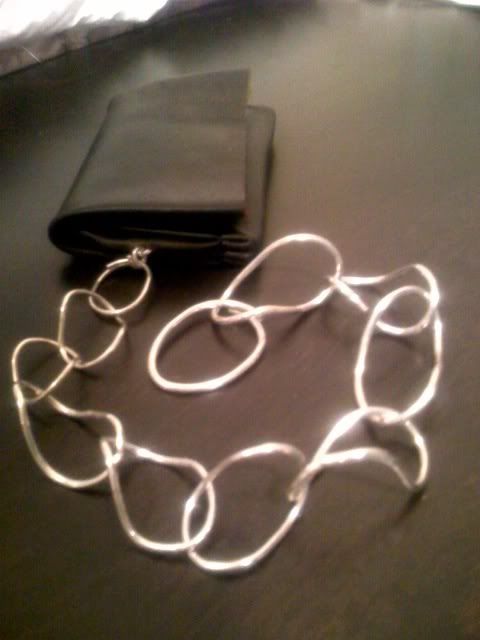
Full sterling moebius chain attached to a sewn leather wallet done based on the MA+ wallet pattern I created from my actual one. I've posted a DIY of that piece on here but you may have to dig somewhat to find it.
The chain was the "new" thing to create this time:
Here are some materials/details that I had originally posted in the MA+ thread:
Wire can be purchased at:
www.artbeads.com
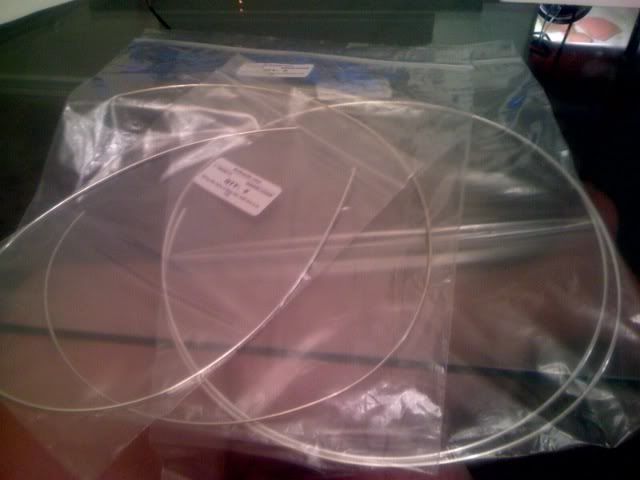
The wire you'll need is gauges 14, 12, and 10
Be sure to get them as full round, half hard (very stiff but still bendable but will keep its shape once bent).
Upon examining the photos of the chain on mindtrive (and other sites) you can see that the moebius rings drop down in size and gauge as you get closer to the wallet proper. More rings are thus of gauge 14 than 12 and 10 (10 being the least... probably like 3 rings).
The wire is pricey. I roughly determined that I need 8 feet in total to make two wallets with chains and that was about $100. Remember, since you're making rings out of the wire you'll need a bunch of other supplies as well:
- flux (to coat the hammered rings when you're going to solder them)
- solder
- clips and stands to hold the rings as you heat them
- acetylene torch
- various "pickling" chemicals needed to remove the burnt on flux
- fine toothed C-saw
- metal file
- rounded end pliers for bending without leaving teeth marks in the silver
- polishing cloth
- and ideally a rawhide hammer (doesnt leave nicks or dents) and a ringmaker's stand & graded cone to hammer around.
__________________________________________________ _____
Here's a bit more info to supplement the photos.
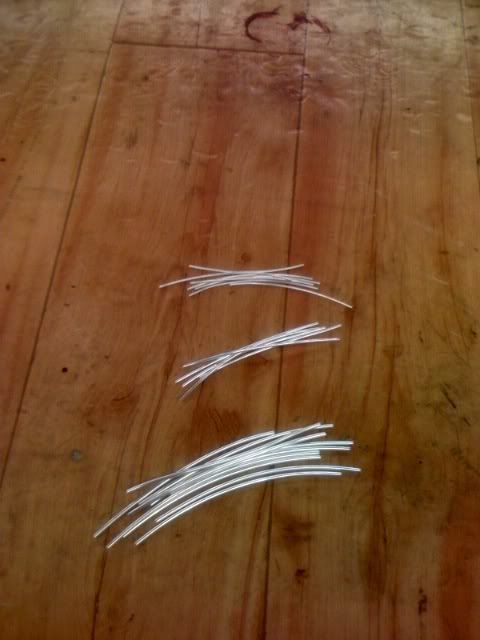
Ring dimensions were guesstimated. I used a paper strip to visualize the size of the rings (the heaviest gauge rings were also the largest and there's a gradual transition to the thinnest gauge) and sawed the wire into pieces from there.
Each cut edge of each piece had to be filed down so that the face was completely flat (COMPLETELY! Otherwise, the solder doesn't seal well and will end up breaking when you're re-hammering and reshaping the ring). This is the most arduous part to say the least. The face has to be a true 90 degree angle from the edge of the wire.
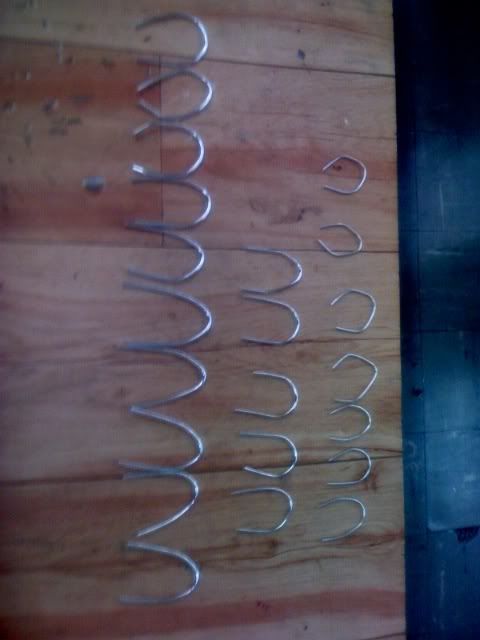
After all pieces are filed, I roughly bent them into U shapes using the ringmaker's stand so that they would round up rather than create a sharper "V" shape when bent.
Then each piece was bent by pliers to make the two cut faces meet and meet flush. This is the second most arduous and time consuming as you have to push and pull each side of the wire just a tad to get it to line up and get it to push against the other face (FLUSH!) with good pressure. No gap can be seen (hold it up to the light to confirm.). Each ring was then looped into the one before it and the process repeated.
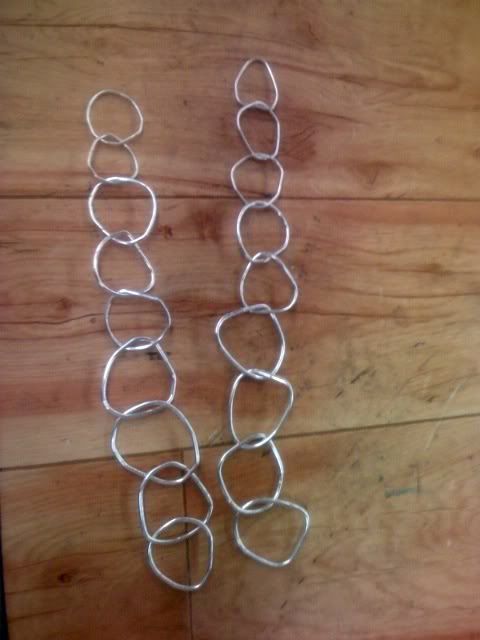
Then it was time to solder. I used "easy" level solder which melts at a low(er) temperature. Still needs about a minute of continuous heat under an acetylene torch. A small piece the length of the face that is to be soldered was cut out and the two faces of the wire gently pulled apart and a piece of solder wedged in between. Thus the tension of the metal holds the solder in place and when the solder melts, it fills the entire face and the pressure of the wire pushing inwards helps create a very nice seal. Repeat.
The whole chain is then put in pickling agent (some semi-caustic chemical to remove the flux residue burnt on there) for 5-25 minutes and then rinsed in water to neutralize the agent.
Then you gotta hammer the shit out of each ring on the ringmaker's stand to create elongated ovals out of each ring. Then you grasp both ends of the elongated oval and twist evenly in opposite directions to create the moebius ring look.
For the two end rings I left them as ovals and did not solder them. Instead you overlap the wire some (think like a keychain ring) so that you can run it through your belt loop and through whatever else you'd like. For my girlfriend's chain, I fashioned a small ring and then bent a smaller 1.5" wire like this:
_______/\______
to fit into the side of the wallet which I finished earlier. You cut a slit so that the upside down V portion pokes out and then you run the small ring through it. Now the wallet has a ring attachment and since the pressure from any pulling on the ring isn't translated directly into a hole in the leather (like it would have if you pierced the leather with the ring itself) you get a nice, clean and long lasting metal to leather connection. I think the MA+ one is done in a similar fashion... but I'm only going by photos so I can't be sure. I then connected the little ring to the small "keychain" link and voila! A MA+ moebius chain wallet!
I made the full wallet chain for my girlfriend and just the chain itself for me. I'll connect it to a wallet eventually (I'm making another wallet for myself over the break too) but for now, I'm happy just wearing the chain. I've tried to capture the moebius spiraling effect but it doesn't translate well in still photos. It's really a lovely effect with the metal gently spiraling and that motion translating from link to link...
If you decide to undertake this project don't underestimate the amount of silver wire you will use! I purchased 8 feet and I probably could have used another 1.5 feet to make the thinner link portion longer and extend the "intermediate" levels somewhat too. Counting the links on the real MA+ wallet photos it looks like there are 13. Mine are both 11. Some of the chain-only MA+ accessory photos show a MUCH longer chain, albeit with nearly no thick chains and mostly thin ones.
The design is genius, beautiful and a distinctly different take on the wallet chain. Kudos yet again to the master of this minimalist design.
*edit*
I've been asked a couple of times already but I am currently unable to make more of these. It's a time issue and also the craft center at the university is closed for all of winter break. The day I did this project was their last day! At the end of my school term (early May) I will be back in the northeast and may have time to make some of these chains. I do plan on making myself another longer version as well as possibly a bracelet version. The metal is not cheap at such large amounts as needed for chains and the labor is intensive. I can understand why Amadei charges $1000+ for the chain with the wallet. It's honestly pretty reasonable given the amount of sheer labor required on both components let alone the material cost of silver and unique leather.
.... now $2k for that leather rucksack he's coming out with is a different story hahaha
Comment