If this is your first visit, be sure to
check out the FAQ by clicking the
link above. You may have to register
before you can post: click the register link above to proceed. To start viewing messages,
select the forum that you want to visit from the selection below.
Once again, thank you all for your comments! I appreciate all the positive feedback and I am even happier that a few of you will try this fun and rewarding craft yourselves!
@lifetolive: Unfortunately they are not for sale. I ended up passing them onto my friend who I made them for and he loved them.
@unwashed: The thread I used for the upper was a 2 cord waxed nylon as I stitched it by hand. For the welt I used a 3 cord waxed nylon for slightly more strength. I went with nylon over natural for strength purposes, they are also less susceptible to the elements/deterioration over time. If using a sewing machine for the upper I'd use a good waxed quilting thread.
As for glue I used a contact adhesive from my local hardware store called "Kwik Grip Advanced". I chose this over a more specialized shoe making adhesives because it was water based, apparently stronger, didn't contain any bad chemicals and didn't emit any chemical fumes or smells when used. (Kind of important for a small apartment and good if your paranoid about bad things leeching into your skin) So far so good, none of the bonds have broken.
@docus: So after the shoe Is made and all the glues have had at least 24 - 48 hours to set I start the distressing.
Whether object or hand dying them they will both at some point be soaked in a liquid.
For object dying you put the complete shoes in a big bucket/container of dye. Let them soak in dye for as intense as you want the dye to be on them. Remove from dye, rinse in cold water until it runs clear.
For hand dying use a rag, paint the dye onto the upper until satisfied with the colour then leave to dry for 30 min. Once dry put them in a bucket/container of cold water and let them soak for about 30 min - 1 hour.
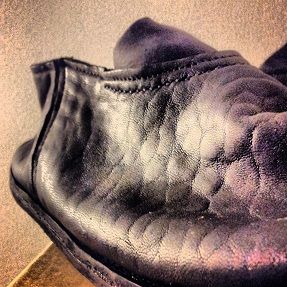
After you remove them from their respective liquids, the shoes at this point are like "play-doh". They are that soft that what I do is flex/bend the toes so they are curled up like a "jesters" shoe. When you do this the leather creases beautifully. You can manipulate them as you see fit. Less curl, less crease. More curl, more crease. The thickness of the leather will also vary the way the leather creases.
When the desired creases have taken shape, leave the shoe to dry curled. This has to happen slowly, to prevent the leather from cracking. In all my experience (including soaking some CCP tornados and guidis in cold water to shrink them slightly) I have never seen the leather come close to cracking. Key words here "COLD WATER" and dry "SLOWLY".
When the shoes are 80%ish dry I then use a good leather conditioner all over the upper to have them feel super soft upon fully drying.
When the shoes are dry your done! You can walk the curl out yourself by wearing them or just bend them back to the almost flat shape you started with. The creases will remain either way.
Wow, all seriously impressive! Have you ever thought about making a pair of boots of some kind? I'd love to see how they'd turn out.
after reading this thread and seeing the amount of work, craftsmanship and time that goes into making shoes like this it really does enhance my appreciation of handcrafted items like your shoes. I would love to see how a pair of boots would turn out. Until then, AMAZING work!
Well the time has come to make another set of derbys and boots.
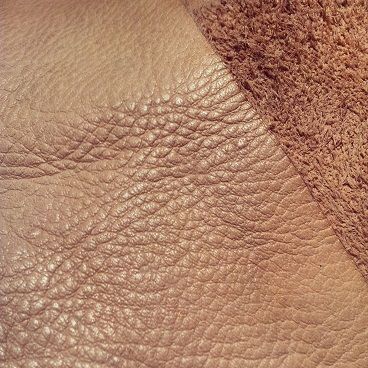
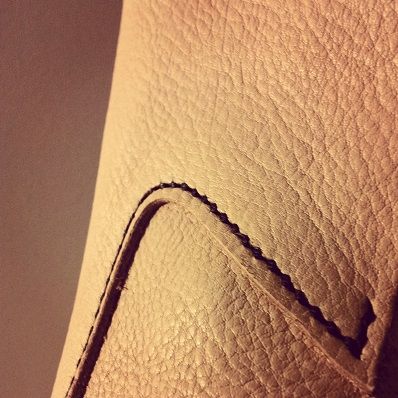
The new leather is in;
Milled full grain vege-tanned cowhide double shoulders. With really nice inconsistancies in the nature texture. Some bits smooth, some like the picture above.
Hopefully this time I can run it through step by step for everyone.
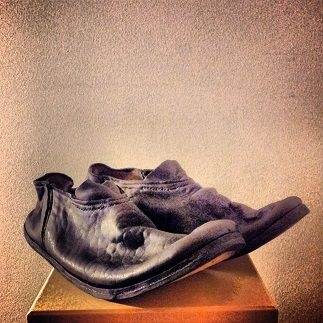
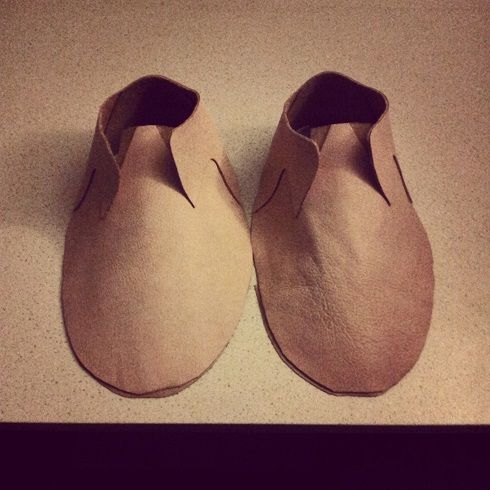
On another note whilst waiting for the above leather, I used some leather I'd been sitting on for a while now to make some slip ons for myself.
The leather is a vege-tanned full grain sheephide with beatuiful natural texture. It is however very difficult to work with as it is really soft and requires lining with another more firm leather. I used vege-tanned calf skin for the lining.
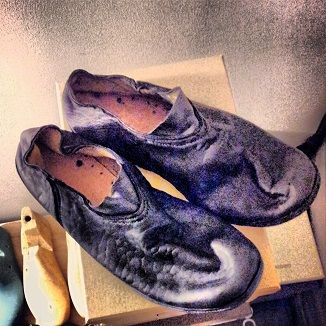
The construction method was a first too. I used a sewing machine for the upper and used cemented construction with nails as the mechanical hold for the insoles/soles. (Kind of like ETS Callatay use)
They turned out OK, the true test with be once I start wearing them.
 Tweet
Tweet


Comment